Dollar Elephant Origami Step by Step
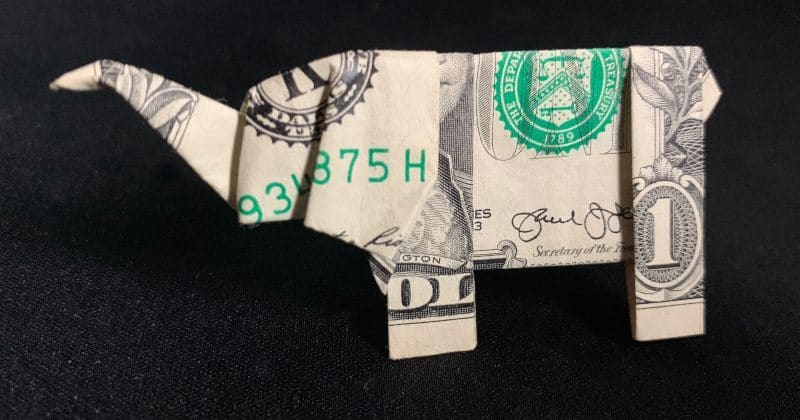
Follow this money origami guide to make a dollar bill origami elephant. This is one of the cooler dollar bill origami animals to make. It is not the easiest dollar bill origami fold, but it is a fun challenge. Let's Get Started! You may also like this other money origami guide: Start with the backside of a fresh dollar bill. Make a crease when folded, and then unfold the bill. Fold the white part to the other side of the bill, then flip the bill over. Once you crease the top right corner, you can unfold it. You can use the crease line you just made to make the next fold. Fully fold to the line you made in the last step and crease it. When you fold left to middle, let the point fold out on top. After you make these folds and crease it, flip the whole bill over. They don't have to be perfect but try to make them as straight as possible. Pull the top layer of the edges in and use your finger or pen to open up the little points. Then squash fold the points down, making them flat. Do this on both sides and then it should look something like this next picture. Flip it over to the other side when these folds are complete. You want it to fold pretty close to the center of George Washington's head. After you crease the fold, you can flip the bill completely over. You can follow lines to first bend the elephant trunk diagonally down behind the front leg. Next, you bend it back so that the top triangular edges of the trunk meet. You can follow the lines to make two more trunk bends. The first one takes the tip of the trunk to meet the belly of the elephant. You can squeeze somewhere on the left edge for the second bend and bend it back over your thumb. You can push the whole trunk evenly underneath the body. Then squeeze the top of the head while you push the trunk back out. Then curve the tip of the trunk a little if you want. Fold a point out between the back legs and fold it flat to make the tail. Bend the bottom ear tip over to meet the front of the leg. You can then turn it inside out to tuck it under the ear. This tucks the point in under the ear to give it a better shape. You can do this on both sides according to your preferences. Take a look at your sweet new dollar bill elephant! You may also like our other money origami guides:
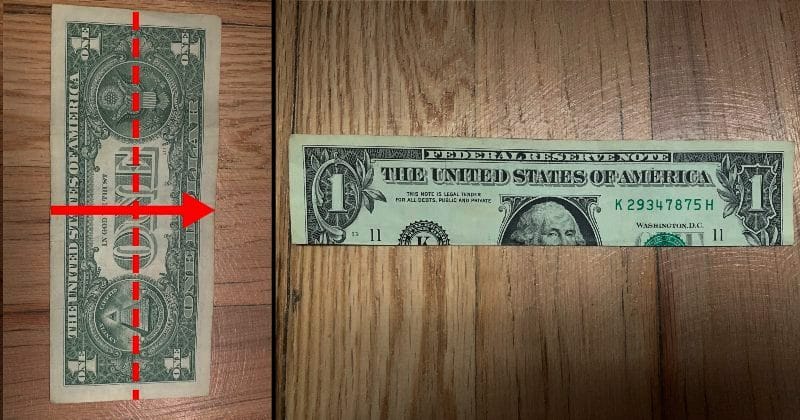
STEP 1: Fold the bill from top to bottom lengthwise
STEP 2: Fold both top corners to the middle crease making a point
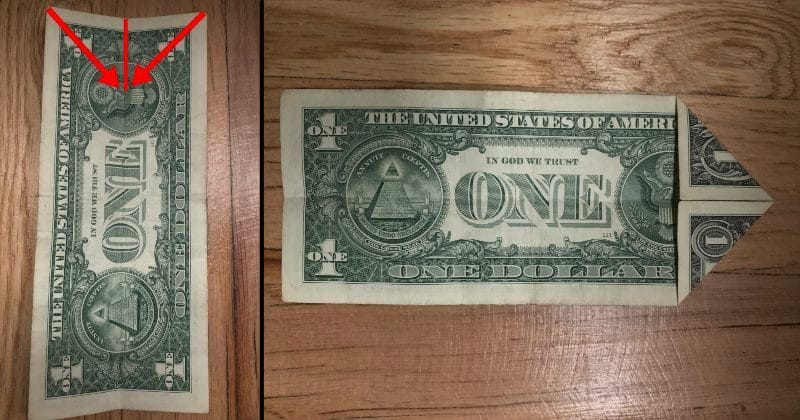
STEP 3: Fold the top corners to the middle crease again

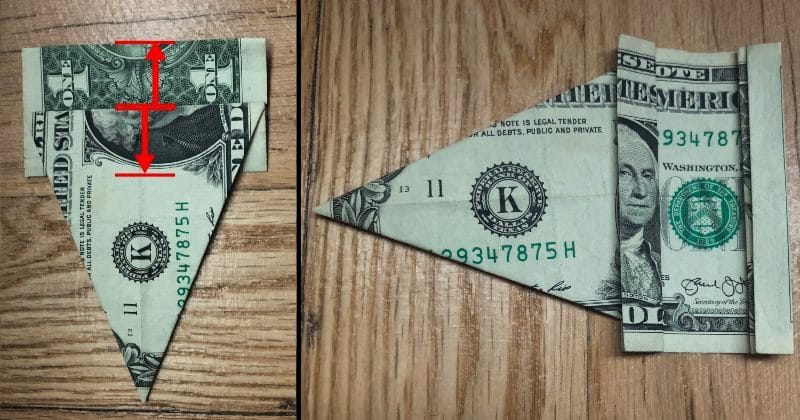
STEP 4: Fold the tip down to meet the bottom of the bill
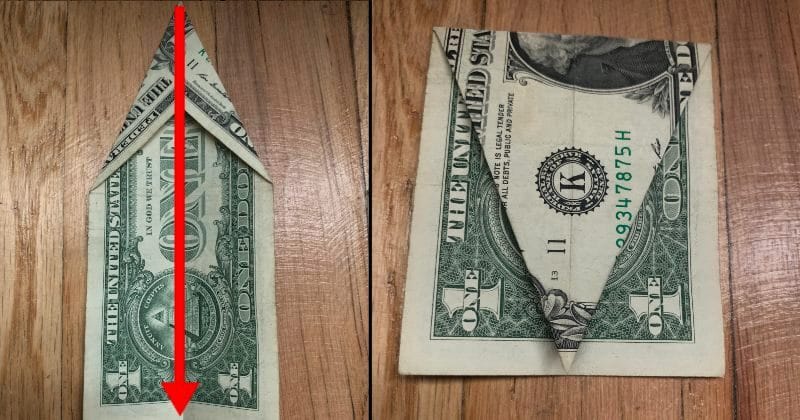
STEP 5: Make a fold on the border of the green on the bottom border of the bill

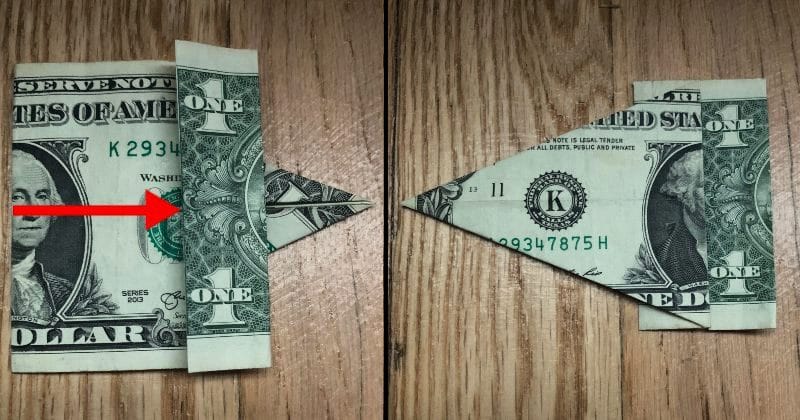
STEP 6: Fold the right edge to the left one and crease the top right corner

STEP 7: Fold the right edge to the small crease you just made

STEP 8: Fold the left outer edge to the previous fold edge
STEP 9: Fold both middle edges to the outside edges of the bill
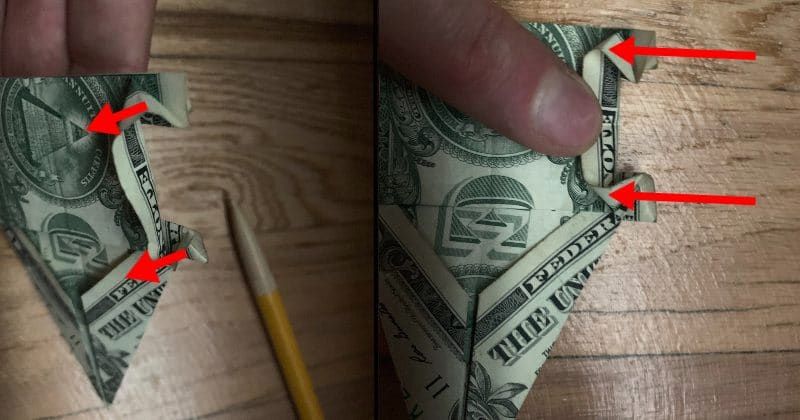
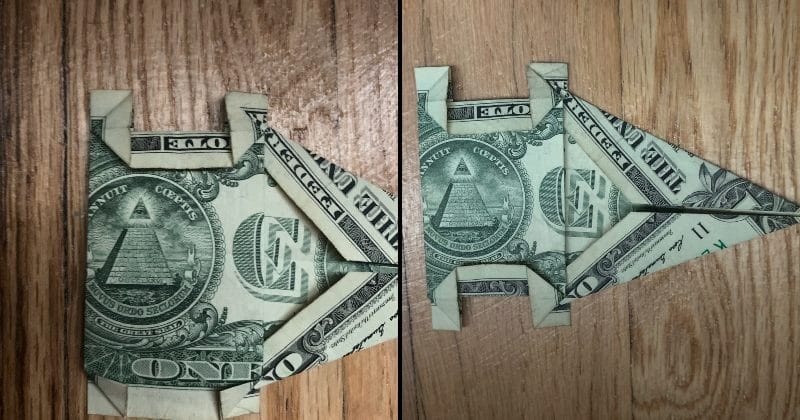
STEP 10: Fold all four top layer corner tips

STEP 11: Make the elephant legs with squash folds
STEP 12: Fold the left point all the way over the top of the bill and flat
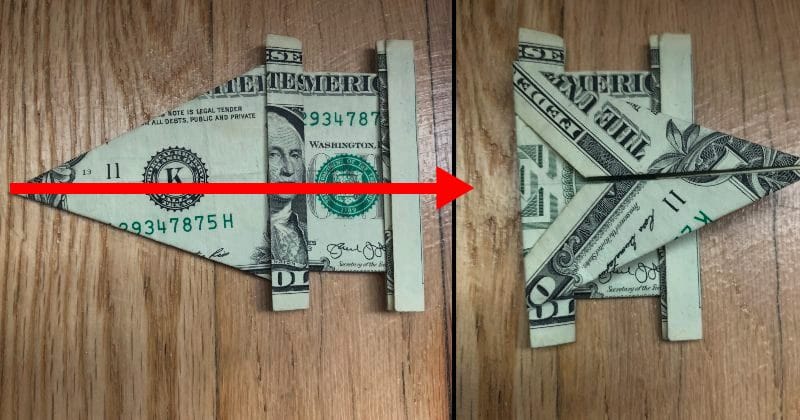
STEP 13: Now fold it back to where it bends on this line
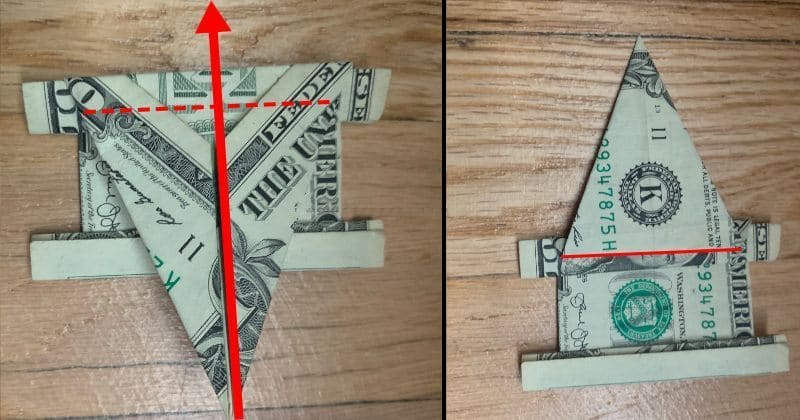
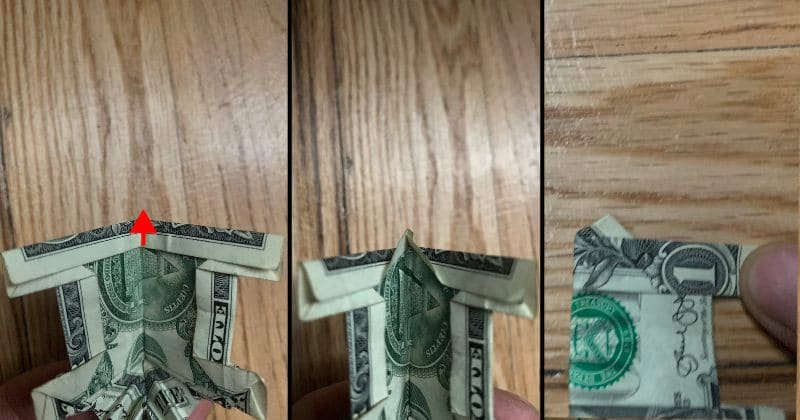
STEP 14: Fold the elephant halves to meet each other
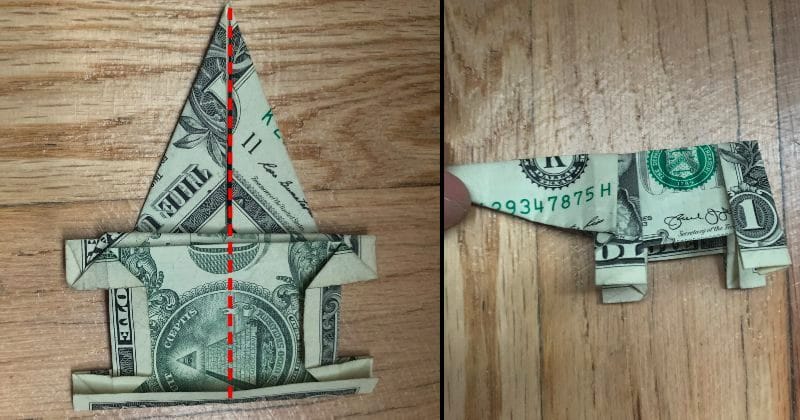
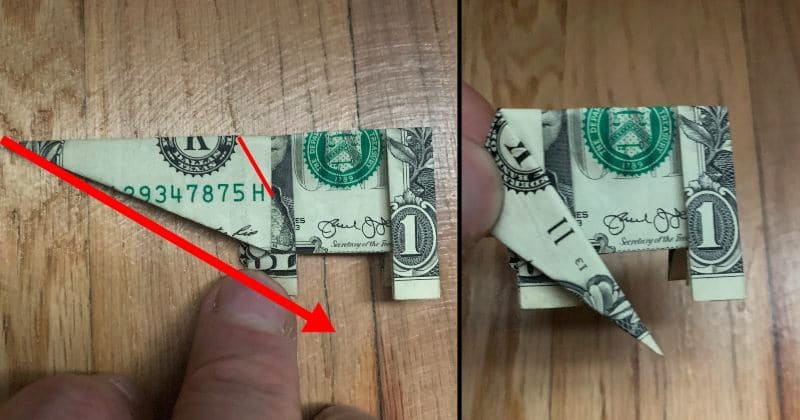
STEP 15: Make the first elephant trunk bends
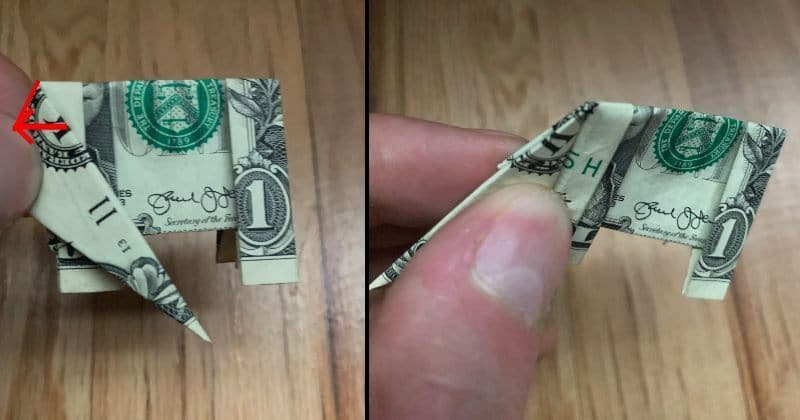
STEP 16: Make the elephant ears
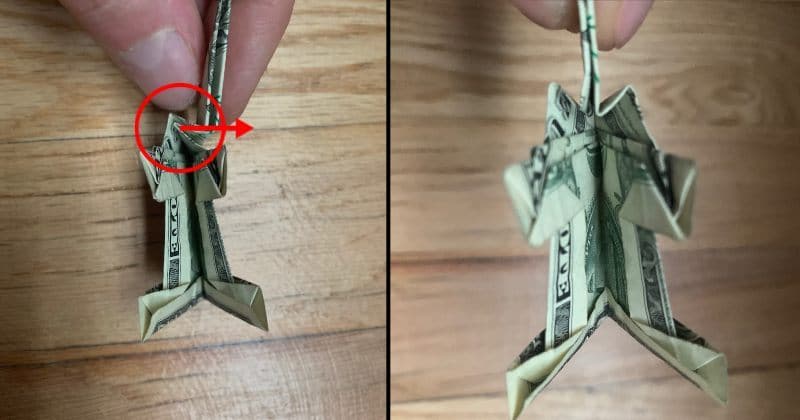
Look from underneath and pull the ears out and fold them even.
Here you pull the trunk straight out, and then as you fold the ears, push the trunk inward.
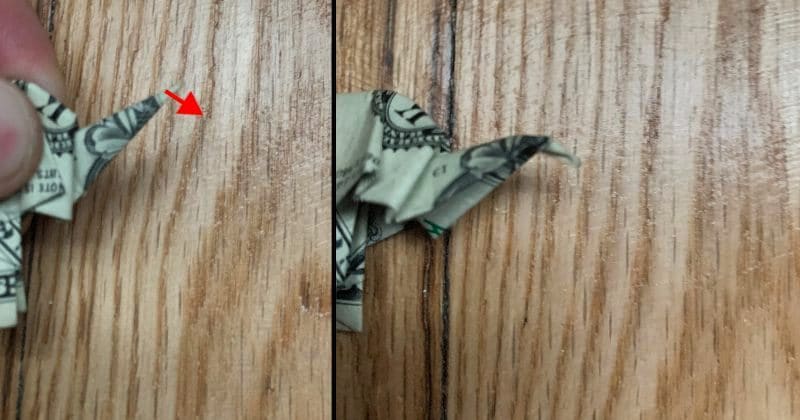
STEP 17: Bend the elephant trunk two more times
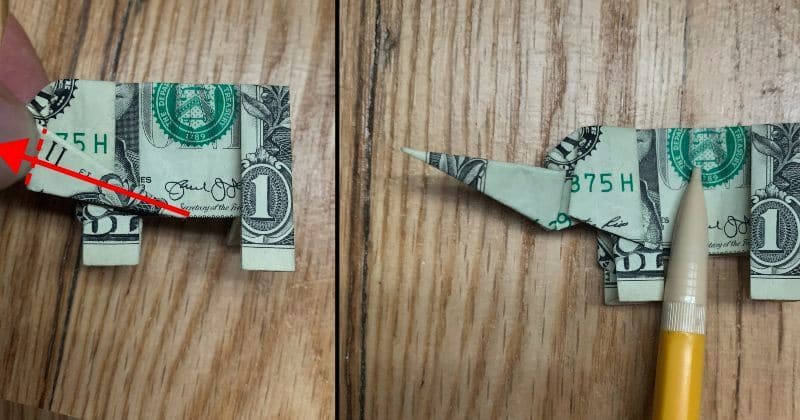
STEP 18: Press the whole trunk underneath and then back up to form the face
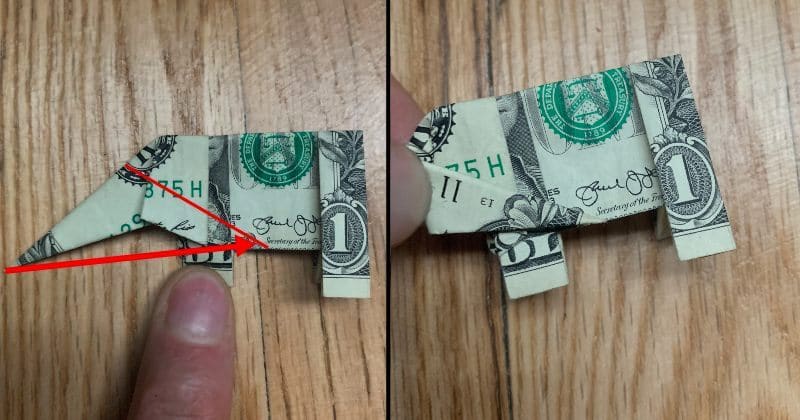
STEP 19: Make the elephant tail
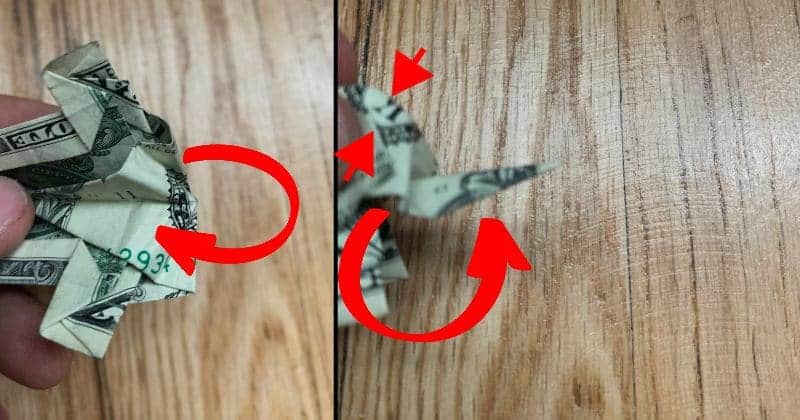
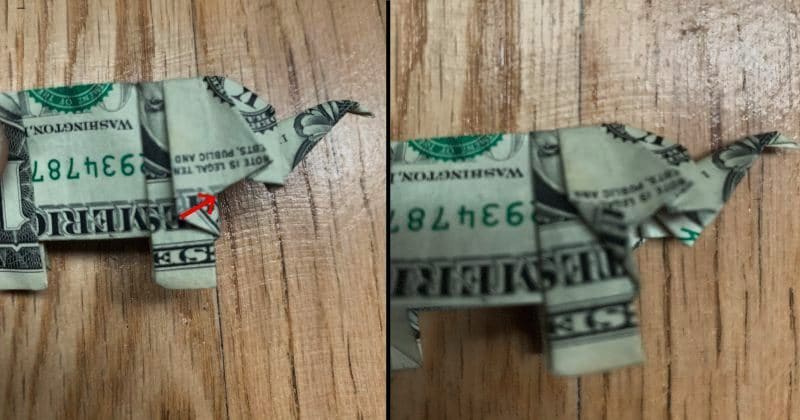
STEP 20: Put the finishing touches on the elephant ears

Dollar Elephant Origami Step by Step
Source: https://the-daily-dabble.com/dollar-bill-origami-elephant/
Belum ada Komentar untuk "Dollar Elephant Origami Step by Step"
Posting Komentar