How to Make Origami in Rhino
Image © fabrikasimf, under a Creative Commons license.
Origami is the ancient art of paper folding to make all manner of shapes, structures and origami art without the need to cut, glue or tape the paper for it to keep its form.
There are hundreds of easy origami animals that can be created this way such as bunnies, dolphins and dogs, with one of the most popular being the origami crane. Learning how to make origami animals is a great craft for children as it helps with their motor skills, patience and creativity, but can also tie in with other activities as well, such as following a visit to a farm or when learning about life cycles.
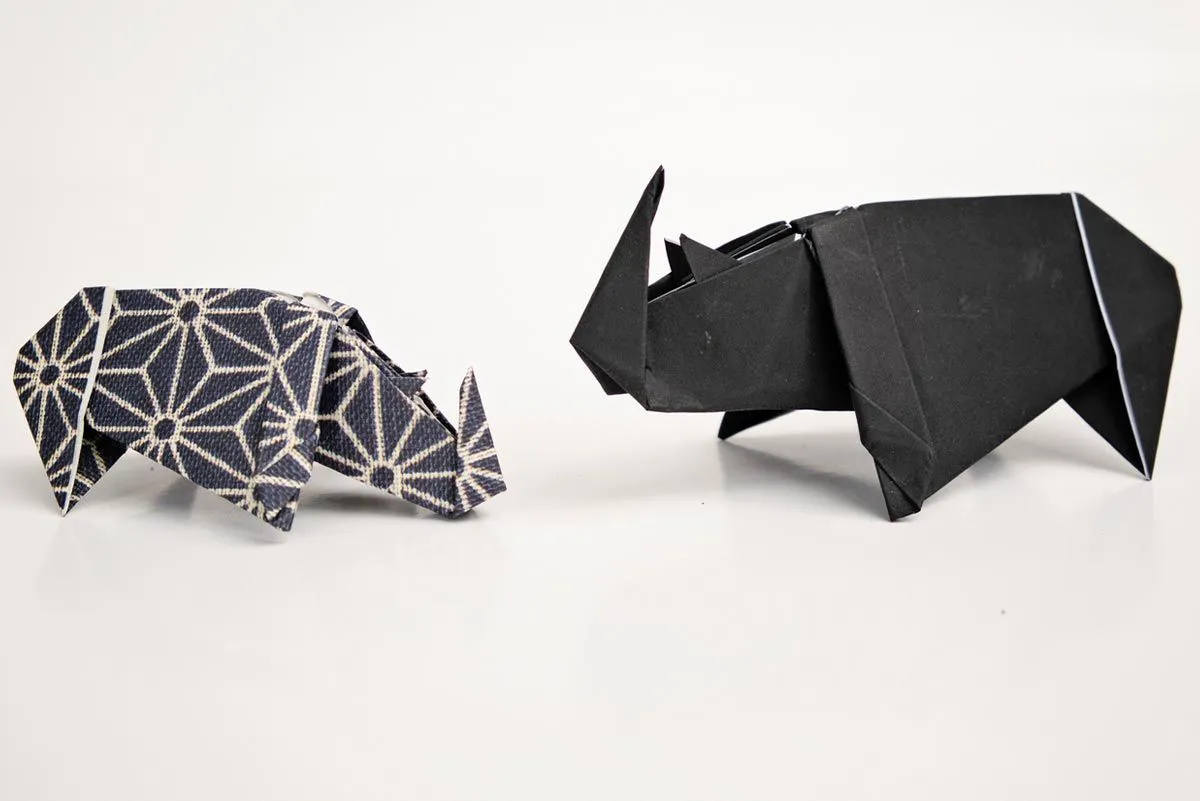
For a quick, fun and relatively mess-free craft, our step by step origami tutorial shows you how to make an origami rhino that stands up on its own. So, find a flat surface to work on and let's get started with some simple origami for kids.
Equipment
Most origami tutorials require very little equipment and this rhino origami is no different. For each origami rhinoceros, all you will need is one sheet of square origami paper. Grey paper is recommended but you can use any colour or patterned paper that you like.
Rhino Origami Instructions
1) To begin your paper folding, start with your origami paper with the coloured side facing down. Fold it in half vertically, crease well and open and then do the same horizontally.
2) Fold the top and bottom right hand corners into the centre.
3) Fold the top and bottom left hand corners in slightly, so that the corner roughly meets the middle of the quadrant it is in.
4) Fold these both back on themselves, but not all the way to create a zig zag fold. These pieces are what will become the hind legs of your origami rhino.
5) Next, fold your origami rhino model in half along the horizontal crease.
6) Keeping the left of your rhino origami pressed closed, open the right hand side up and squash fold it flat over to the left. This should create a diamond shape facing upwards with a vertical crease visible down the centre.

7) Fold the right hand side of the diamond behind the model along the centre crease.
8) Pull the right hand side of your origami rhino out slightly and press down to create a point. This is what will become the face of your origami rhino.
9) Fold this point about a third of the way back over on itself, crease well and then unfold.
10) Use an inside reverse fold to fold the point inside itself at the crease you have just made.
11) Use another inside reverse fold to bring the very end of the point back out on itself. This will be the horn of your origami rhino.
12) On the horn piece of your origami rhino, fold the outer edge in on itself ever so slightly and repeat on the other side to create a pointer horn.
13) Shape the head area of your origami rhino by folding the top edge behind slightly and the left point behind itself. You should now have the perfect head shape for your origami rhinoceros.
14) Fold the top left corner of your model behind itself, crease well and then unfold. Use a reverse fold to then fold this in on itself along the crease you have just made.
15) Pull each side of your origami rhino out ever so slightly and then stand it on a flat surface - your rhino should stand on its own and the origami tutorial is now complete!

Tips And Tricks
If you want to add details to your origami rhino, you could always stick on a pair of googly eyes and two little ears.
If you want to have another go at this tutorial, try using different sizes of origami paper and you can make a whole crash of rhinos.
Why not also try some of our other origami tutorials that give step by step instructions on how to make paper animals. You could create a whole safari!
Source: https://kidadl.com/articles/how-to-make-an-origami-rhino-that-stands-up
Belum ada Komentar untuk "How to Make Origami in Rhino"
Posting Komentar